Very few outdoor experiences can compare with spring turkey hunting. The sport can, to say the least, be challenging, exciting and in some cases almost addictive. When a gobbler sounds off up close, or he’s strutting just out of range, even the most experienced hunter’s heart tends to pound uncontrollably. This is because a wild turkey’s senses are extremely keen. Its eyesight and hearing are among the best in the woods. I’ve often heard it said, “If a turkey could smell, you’d never kill one.” Due to a turkey’s nature to flee at the first hint of danger, one errant move can cause a gobbler to seemingly vanish like a puff of smoke.
This is the challenge that makes turkey hunting so intriguing and is helping to attract droves of new hunters to the sport. This article covers some of the basics to help get you started hunting wild turkeys.
Scouting
Before you can hunt wild turkeys, you’ve got to find them. The easiest way is to start with the big picture, locating general areas of turkey habitat, then gradually narrow it down to a certain area, then a certain piece of property, then specific hunting sites. Wildlife biologists, conservation officers, sporting goods dealers and hunting club members are good places to start. Ask about federal and state lands, wildlife management areas, reservoir properties and military reservations. Don’t overlook private lands. Some landowners will grant permission to hunters who ask courteously, or perhaps you can wrangle an invitation out of a friend.
Field scouting begins after you have identified several possible hunting spots. Get a good map of the area you plan to hunt. Drive the back roads during the first couple of hours after dawn, stopping along ridges, high points, power lines, open creek and river bottoms to listen for gobbling.
Use a turkey call or a locator call, such as an owl hooter or crow call, to try to get a response. When you hear a gobbler, mark the location on a map. If you get a bird to answer you, don’t continue to call to him. This often causes gobblers to become call shy and they will not respond to you once the season opens. Additionally, birds that continue to gobble also tend to attract the attention of other hunters who might be scouting the area.
Finally, scout your best locations on foot. Check for signs of scratching where birds have been feeding. Droppings and feathers can also provide you with information about turkeys in the area. Gobbler droppings tend to be club shaped, while hen droppings have a corkscrew appearance. A gobbler’s body feathers are black tipped, while hen feathers are buff colored. Check along creek banks and around mud holes for tracks. In the evenings listen for birds flying up to roost. If you are able to roost birds, come back the next morning and listen for gobbling.
Make as many trips to the area as possible before the season starts. Learn the terrain features: creeks, log roads, fencerows, pastures, etc. This will help later when you are maneuvering during an actual hunt. Hopefully, by opening day you will know the location of several gobblers.
Camouflage
Because wild turkeys have such keen vision, camouflage is almost a must to avoid being seen. This normally includes a camo suit, cap, facemask and gloves. Don’t forget to wear dark colored socks so that they don’t show when you sit down. Many turkey hunters also wear a camo vest with plenty of pockets to carry calls, shells and maybe a snack. These vests often have a drop-down padded seat to add a little comfort while you’re working a bird.
In recent years camouflage makers have come up with a wide array of patterns and colors. Try and match the color of the foliage where you will be hunting. Early season patterns with mostly browns and grays usually blend in best, while patterns with more green mixed in blend in better as new leaves bud out. Always remember: controlling movement is most important regardless of how well you are camouflaged.
Shotguns and Ammunition
The best shotgun and ammunition for turkey hunting is the combination that delivers a dense, hard-hitting pattern at 40-45 yards. Most hunters use larger gauges (12 or 10 gauge) with tight chokes (full or extra full). Shells are usually 3 or 3 ½ inch magnums loaded with #4, #5 or #6 size shot. The smaller the shot size (the larger the number), the greater the number of pellets in a shell. However, the smaller pellets weigh less, carry less energy and provide less penetration at longer distances than pellets of a larger shot size.
Before hunting, pattern your shotgun to see which choke, brand of ammunition and shell load produces the most uniform pattern and density. Pattern performance will vary with different gun, choke, load and ammunition manufacturer combinations.
To pattern a shotgun for turkey hunting, use a target that depicts a turkey’s vital head and neck area (make several copies). The head and neck is what you should be shooting for when your turkey comes in range. Set the target up at 40 yards and shoot from a rest. Compare the number and density of pellets striking the vital area with the different choke and ammunition combinations to see which one shoots best in your gun. You should have at least 8 to 10 pellets in the vital area at 40 yards. Once you get satisfactory results at 40 yards, fire additional rounds at 25 and 45 yards. These rounds will show you what patterns you can expect at different distances and help you determine your shooting limits.
Calls and Calling
Good calling and knowing when to call are often critical keys to success in turkey hunting. Hunters typically imitate hens to call a gobbler into gun range. Hens make a variety of calls: yelps, clucks, cuts, purrs and whines. The best way to learn to call is to practice with an experienced turkey hunter or to purchase an instructional video or audio cassette and then practice the calls taught by the instructor. It isn’t necessary to become an expert in each of these calls to have success in turkey hunting. Gaining a good command of yelps and clucks will be of most benefit to new turkey hunters.
As with camo, guns and shells, a number of different types of calls are used in turkey hunting. The most popular styles include box calls, slate-type friction calls, wingbone and trumpet calls, diaphragm calls, push-pin and tube calls. Beginning hunters should normally consider box calls, slate-type friction calls and push-pin calls for their ease of use.
On a given day any of these calls will work. Each style call has its own distinctive sound. A gobbler will sometimes answer one call but not the others. So, carry several calls and take turns trying them. If one call doesn’t get a response, another one might.
When calling turkeys, less is better in most cases. Don’t over call. The more you call, the more likely you’ll hit a sour note or that your movement will be seen by an alert gobbler or hen that has quietly moved in to check you out.
The Hunt
Once you locate a gobbler, the next step is to move in close and call him into gun range. Your goal is to slip as close as possible without spooking him. Then you “set up” and attempt to call him close enough for a shot.
Remember: when approaching a turkey, if he spots you, he’s gone! Be careful not to be seen. Terrain and foliage normally dictate how close you can get before setting up. Veteran hunters rarely approach inside 100 yards. They may set up as far away as 300 yards if the ground is flat and there is little foliage to conceal their movements.
Use the terrain to your advantage as you approach a gobbler. Stay behind hills, thickets or other features that will screen your movements. Walk as quietly as possible in the leaves, and don’t break any sticks.
When setting up, pick a location that offers the gobbler an easy route to your location. There should be no creeks, gullies, fences, thick undergrowth or other barriers between you and the bird. Also choose a spot that is on the same contour or slightly above the turkey’s location. Don’t try to call a gobbler down a steep slope. Pick an area that provides you with a good view of your surroundings.
Sit against a tree, stump or other object that is wider than your back and taller than your head. It will hide your outline and protect your back from a hunter who might move in behind you. Face the turkey’s direction with your left shoulder (for right-handed shooters), this provides you with a greater mobility of your gun when aiming. Above all, keep your movement to a minimum as you call. If the gobbler is working toward you, then goes silent, don’t move. Sometimes gobblers will sneak in quietly.
If you set up and a gobbler answers your call but won’t come, you’re going to have to change your game plan. You may need to circle around and call from another location. You might change to another call. If you’ve worked him a long time and he’s still hung up, you might leave the gobbler and come back in a couple of hours and try again. Many hunts require several moves and/or strategy changes.
Once you get a bird working to you, get your gun up on your knee pointed in his general direction with the stock against your shoulder. When a gobbler finally walks within range (inside 40 yards), wait until he steps behind a tree or other obstacle to move your gun. When he reappears, aim carefully at his head/neck junction, and then squeeze the trigger. When a gobbler struts, the neck (spinal column) is compressed and the head is often partially hidden by feathers, making for an even smaller target. If the gobbler is strutting, wait until he extends his neck to shoot. A clean, one-shot kill should be the goal of every hunter.
It’s a great moment when a long beard answers a hunter’s call. This is when all the scouting and preparation pay off. It may not always result in bagging the bird, but that’s part of the challenge and the memories. If you listen to a veteran turkey hunter, you’ll note that the hunts most often remembered are those where the gobbler, and not the hunter, won.
Friday, April 8, 2011
Wednesday, April 6, 2011
Barbecued Wild Turkey

Ingredients
One stick (1/2 cup) margarine
1/2 cup chopped green onions or chives
1/4 cup lemon juice
1 Tbsp. thyme and savory, mixed
1 cup broth
3 Tbsp. parsley
Directions.
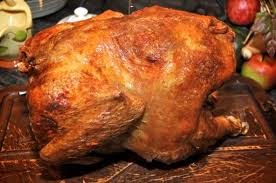
Cut turkey into pieces across the grain. Cook onions until tender in butter, add other ingredients. Bring to a full boil. Cover each piece of turkey with this mixture. Baste often on grill. Cook 45 to 55 minutes or until done.
Guided Merriam's Turkey Hunts - Nebraska Hunting Company
Monday, April 4, 2011
Wild Turkey - Making a Turkey Cape

Making a Turkey Cape
Although there are several ways to display your trophy tom, one of the easiest and least-expensive ways is by caping your turkey.
Caping is inexpensive, easy to do, and extremely satisfying. Simply skinning your turkey from head to tail, cleaning and boraxing the skin and pinning it to a flat piece of cardboard is all that's involved.
Follow the simple instructions below for a good looking and simple way to capture the memory of a special hunt:
•To begin, hang your tom by the head.
•With a sharp knife, cut the skin where the feathers on the neck meet the skin of the head.
•Continuing down the center of the back and toward the tail, remove the skin in an approximate two-inch wide strip. You will notice that the feathers attach to the skin in rows and the narrow strip of skin actually holds a much wider angular blanket of feathers.
•Remove the skin to and including the tail skin.
•With knife and spoon, remove the fat and flesh.
•Cover wet skin in Borax.
•Lay Borax covered skin on large piece of flat corrugated cardboard.
•With straight pins, pin the head end to cardboard.
•Fan tail, spread to the desired width and pin each feather in place.
•With a pocket knife, lay each feather in place.
•Let dry three to four weeks.
•Remove pins, shake loose Borax and hang.
•You may wish to mount the cape on a piece of wood cut to fit the cape.
Cleaning Your Wild Turkey
If you're a turkey hunter, you're used to making decisions. And, after choosing the right turkey loads, camouflage, decoys and calls before entering the spring woods, it's a relief when the final decision of the hunt is how to care for and cook your bird. Cleaning your turkey is the first step, and regardless of whether you plan to skin, pluck or breast out and cut up your bird, doing it properly is both quick and easy. Just follow these simple steps.
1. If you don't plan to cook your bird whole, start by laying the turkey on it's back. Remove just enough breast feathers so as to expose the skin.
2. To remove the breast filets, pull or cut the skin back from the breast. Make cuts along each side of the breastbone as well as on the inside of both wings or the clavicle. To save the wings, peel the skin back and remove the wings from the cavity by cutting through the joint.
3. Find the breastbone and make an incision down each side of the breastbone to loosen the breast filet from the bone. Work from the rear of the breast forward, fileting off the breast by pulling the filet and using the knife as needed. Repeat this for the other side of the breast.
4. To remove the thigh and leg, cut through the thigh muscle where it attaches to the back. Then grab the thigh or leg and pull up until you can feel the joint pop loose. Keep cutting through the thigh until it comes free from the turkey's body.
Considered the traditional style of cleaning a wild turkey, plucking is a perfect way to prepare your bird to be roasted, smoked or whole deep-fried. Before you remove the entrails or field dress the turkey pluck the turkey's feathers to help keep the moisture in the turkey while cooking it whole. Remove the feathers after dipping the bird in hot water. Some people use boiling water but it has been said that 140-degree water is optimal for plucking a bird. Plucking does take time and produces more of a mess than does skinning; however, the taste of deep-fried or roasted turkey skin is worth the effort.
Plucking vs. Skinning
Many of today's turkey hunters prefer skinning to plucking. Skinning a turkey allows you to cook the bird by frying or grilling the pieces of meat. You can skin and fillet the turkey breasts, and slice as much meat from the legs and wings as necessary. Make a cut just along one side of the breastbone. Then, it's just a matter of working the skin off the breast halves, down the back and over each of the legs. In some states it's illegal to only fillet the breast out, leaving the rest of the carcass behind. Always check your state's hunt regulations, and make sure your turkey is properly tagged for transportation.
Field Dressing
In hot weather hunting conditions, field dressing your bird is a good idea before you clean it for the table. If you decide to field dress your bird, start by placing the turkey on its back. Find the bottom of the breast plate and insert your knife, making a cut to the anal vent. Remove the entrails from this opening and then reach into the cavity to sever the windpipe, heart and lungs. Cool the cavity by placing ice inside the chest.
Subscribe to:
Posts (Atom)